Last updated at 20 October 2014: Guide has been updated for OSX 10.9.5. Plus, minor hyperlink and text changes.
Apple Macintosh operating system has always fascinated me for a long time, mostly because I was never given an opportunity to use it. Ever since childhood, people with Macs would often shun me from using their Mac. I had absolutely no idea how a Mac worked or looked like in proper detail except the home screen/desktop which I often saw in screenshots. All this made me curious about getting myself a Mac. What really put me off was their expensive pricing and low performance to cost ratio, not to mention my parents’ unwillingness to buy one for me. But given that Macs have a very nice UI and very good design tools, it did stay as a wish on the back of my mind.
Back in 2007, I stumbled across the OSX86 project (better known as Hackintosh), which was a collaborative hacking project to run the Mac OS X computer operating system on non-Apple personal computers with x86 architecture and x86-64 compatible processors. This project has taken great strides ever since Apple decided to switch to Intel, abandoning its PowerPC based Macs. It seemed very interesting but at that point of time I did not have the recommended hardware for running OSX.
Two months back, my dad decided to buy a HP Z420 workstation so that I could learn about high performance computing and how to operate GPGPUs. Now that I had a computer worthy of running experiments, I decided, why not build my very own Hackintosh. The idea seemed good, but the 1TB HDD was already partitioned with Windows and Linux, making it useless for me to install anything else. I bought myself a 4TB Seagate SATA HDD to expand my storage and also to install and see what Mac looks like.
Before I begin with the guide, I’d like to state the specifications of my workstation, so as to prevent any further confusion:
- Build: Custom-built HP Z420 workstation
- Motherboard: Intel C602
- CPU: Dual Intel Xeon E5-1620 v2 @ 3.7GHz (2 x 4 core = 8 core)
- RAM: 4x 8GB ECC DDR3 @ 1600 MHz
- GPU: AMD FirePro W7000 4GB
- PSU: PowerSolutions 600W HP PSU
- Storage: 1TB Toshiba SAS HDD 14k RPM, 4TB Seagate SATA HDD 7200 RPM
- Case: HP Z420 liquid cooled full ATX case
- Audio: Realtek HD audio, AMD FirePro HDMI/DP audio-out
- Network: 1 Gigabit ethernet port, 1 DLink DWA-125 USB 11n wifi adapter
- Monitor: HP EliteDisplay E221 1080p 21″, Samsung 1080p HDTV
- Interfaces: 4x USB 3.0 + 4x USB 2.0, 1x Firewire
- Optical drive: DVD+-RW / DVD-RAM drive
Now that I have stated everything, lets begin. This guide you’re about to read is specific to my build of the HP Z420. Most of the guide will work as it is on the HP Z220, Z420, Z620 and Z820 workstations. However, some steps might vary depending on your CPU microarchitecture (if you have a different Xeon model) or if you use a different GPU (like Nvidia).
Creating the Mac OS X installer
When it comes to OSX 10.9 Mavericks, the easiest Hackintosh installer that works with HP Z420 is Niresh’s distro/build. You can get it here. Just hit the download button, get the zip file. Unzip it to get the torrent file and use the torrent file to get the .dmg image with a BitTorrent client like uTorrent. Also grab Win32 Disk Imager if you are currently on Windows.
That .dmg file is a bit-by-bit image of the installer disk in Apple’s HFS+ format. We need to write it to a flash drive of 8 GB or greater.
Creating the installer on Windows
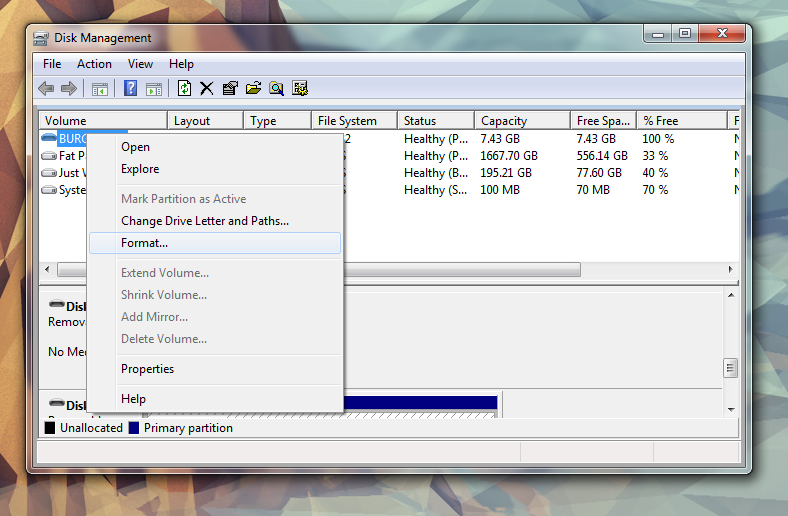
If you are using Windows, plug your USB drive into your computer, and open Windows’ built-in Disk Management utility. You can easily do this by typing “partition” into your Start Menu search bar and choosing the “Create and Format hard drive partitions” option.
You will see a list of drives connected to Windows. Right-click on your USB drive, and click “Format”. From here, erase the USB drive (you can rename and format the drive any way you want– it doesn’t really matter).
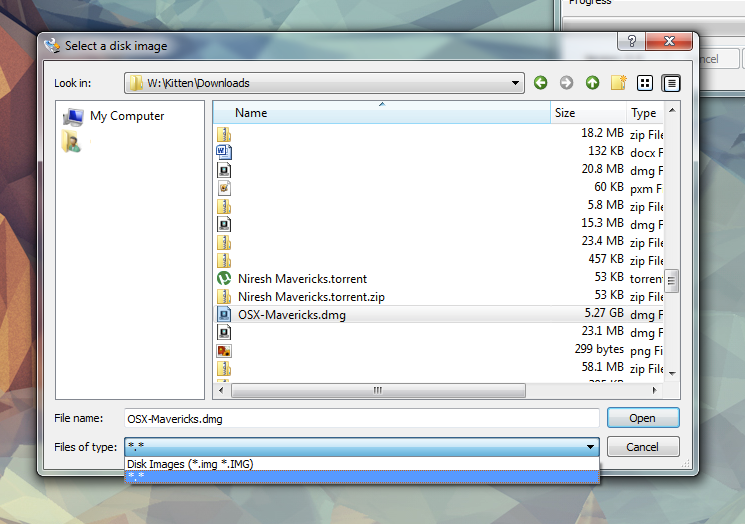
Next, open Win32 Disk Imager. Click the blue file icon on the app’s main screen. In the Windows Explorer window that pops up, select your downloaded Niresh disk image; this file will probably be named “OSX-Mavericks.dmg”. (You will only be able to see the file when you select the “*.*” option in the “Files of type” field– the default “Disk Images” option won’t work)
Next, select the device letter of your USB drive, and click “Write”.
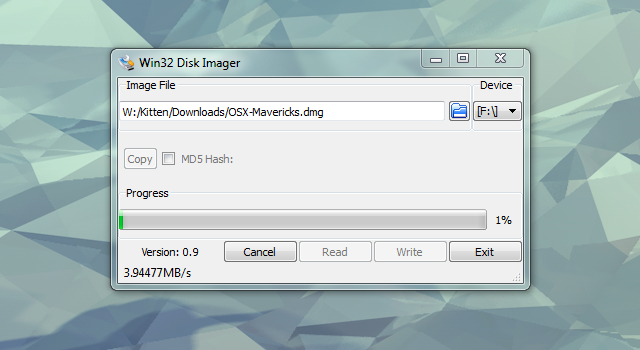
Win32 Disk Imager will begin writing the Niresh disk image onto your USB drive. This will probably take 10-15 minutes, though it may take longer, depending on the speed of the drive. Once it finishes, your USB drive will contain a fully bootable version of the OS X Mavericks installer.
Creating the installer in Linux
On Linux, one has to just plug in the USB drive. If any partitions are auto-mounted, be sure to unmount them. Then, issue the
dmesg
command in the terminal to find out the device for the USB drive.
Suppose the USB drive is /dev/sdc, one has to type the following in the terminal:
sudo -i
cd <path/to/dmg/>
dd if=OSX-Mavericks.dmg of=/dev/sdc bs=16K
Once the command finishes and gives an output with no errors, you’re sure that the USB installer is ready.
Setting up the workstation and BIOS
Before we begin installing, we need to take care of certain things.
Any external USB connected device that is unnecessary during installation is better removed than plugged. So its best to unplug your wireless adapters, dongles, phones, webcams and the like.
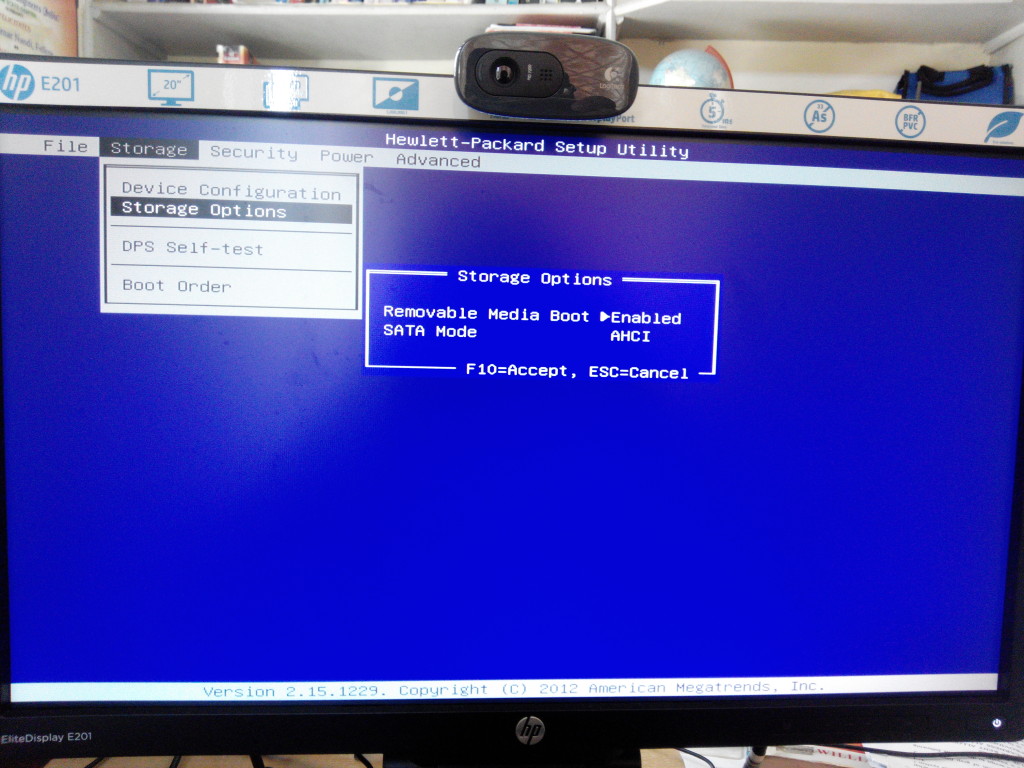
After that, we need to configure the BIOS settings, because OSX only works with certain motherboard settings that closely resemble the settings on Macs. Power down the workstation and power it on again. While its booting up, press F10 to enter the BIOS settings.
Navigate using the keyboard to Storage > Storage options. Enable removable media boot and change SATA mode to AHCI.
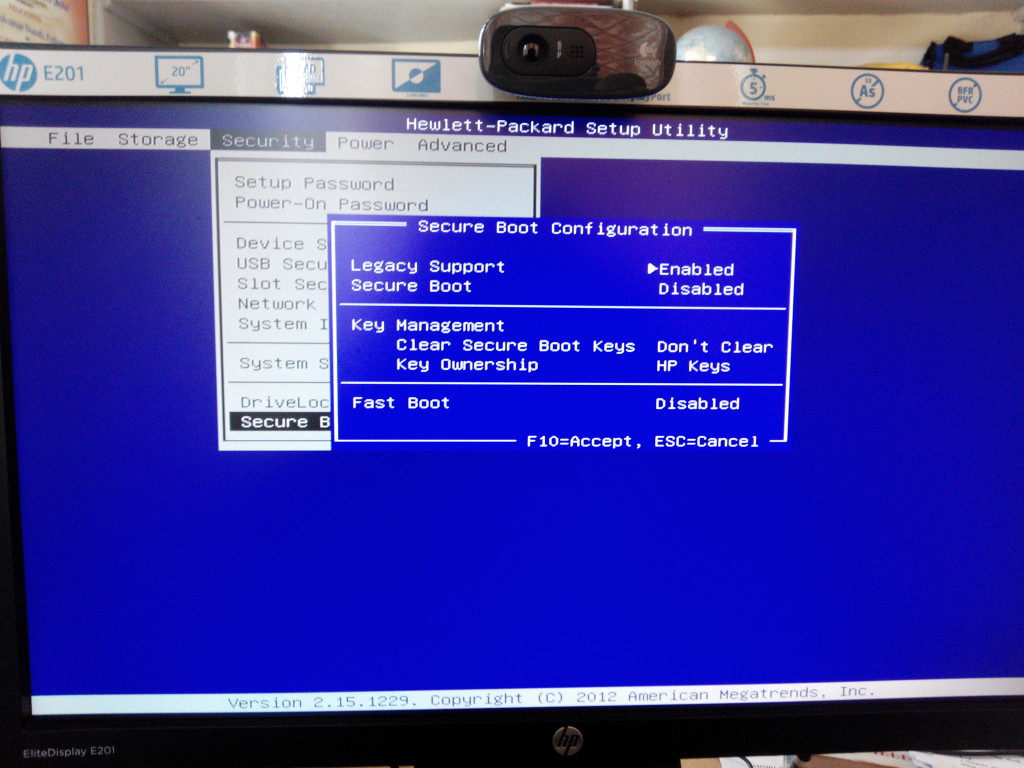
Then go to Security > Secure boot and disable Secure boot.
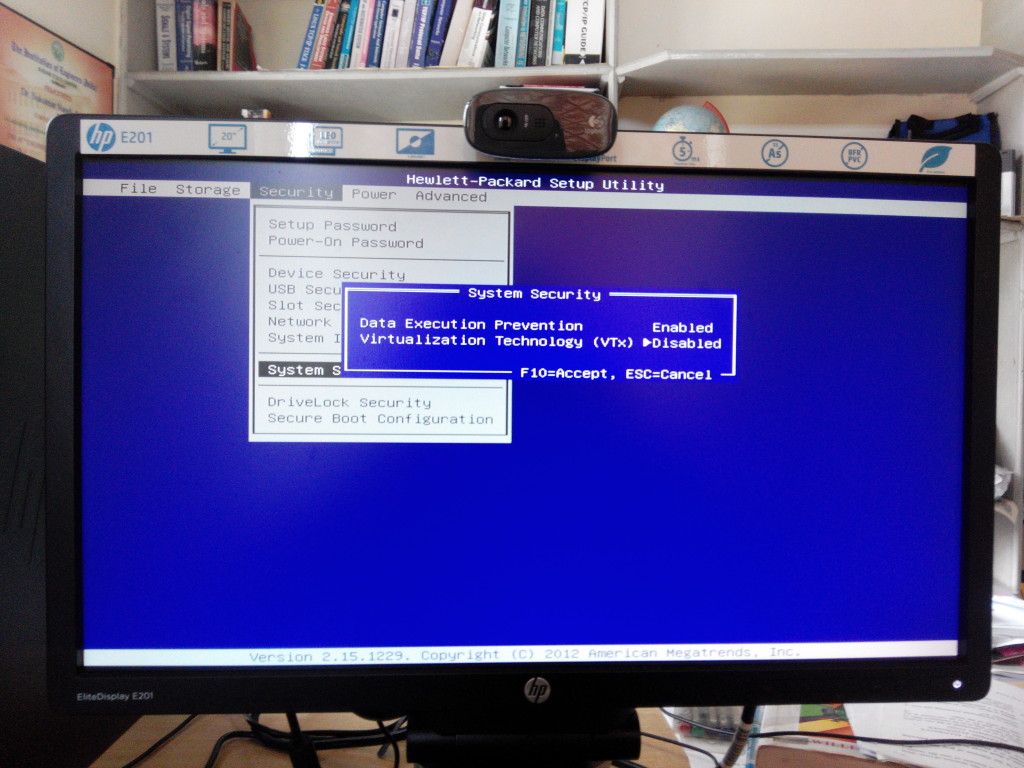
Then go back one step and then to System Security and disable Virtualization Technology (VT-x).
Save the BIOS settings and exit.
Installing OSX 10.9
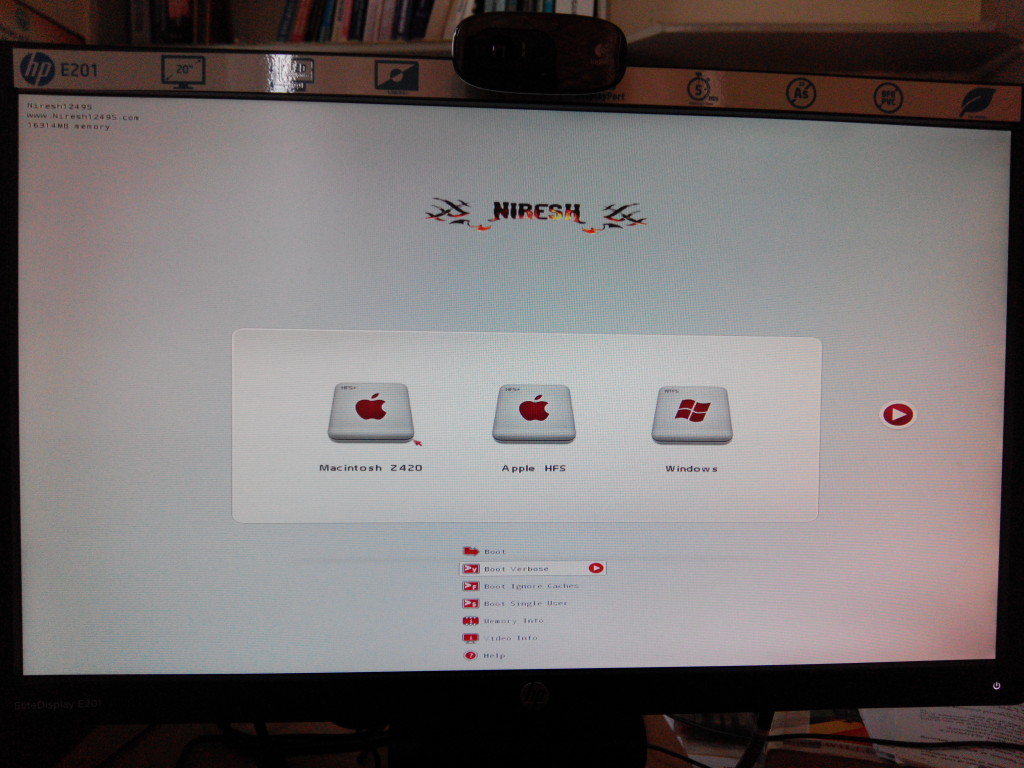
Plug the freshly created OSX installer USB drive into a USB port on the workstation. Power on the workstation. While its booting up, press F9 to open up the boot menu and choose to boot from the USB drive.
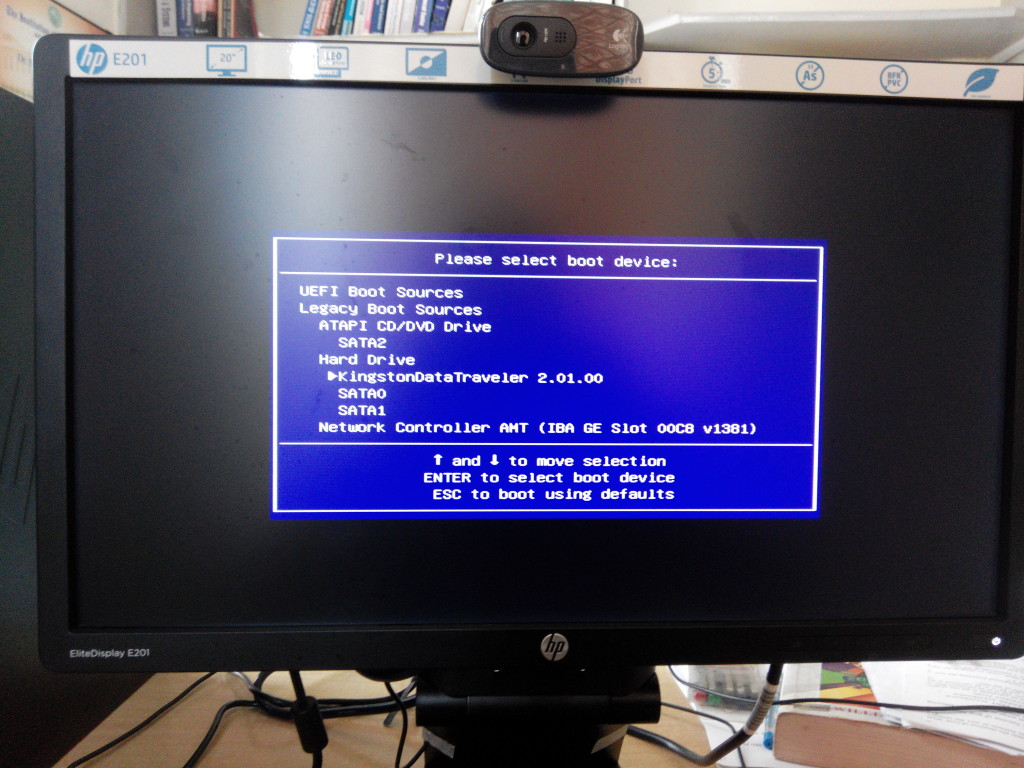
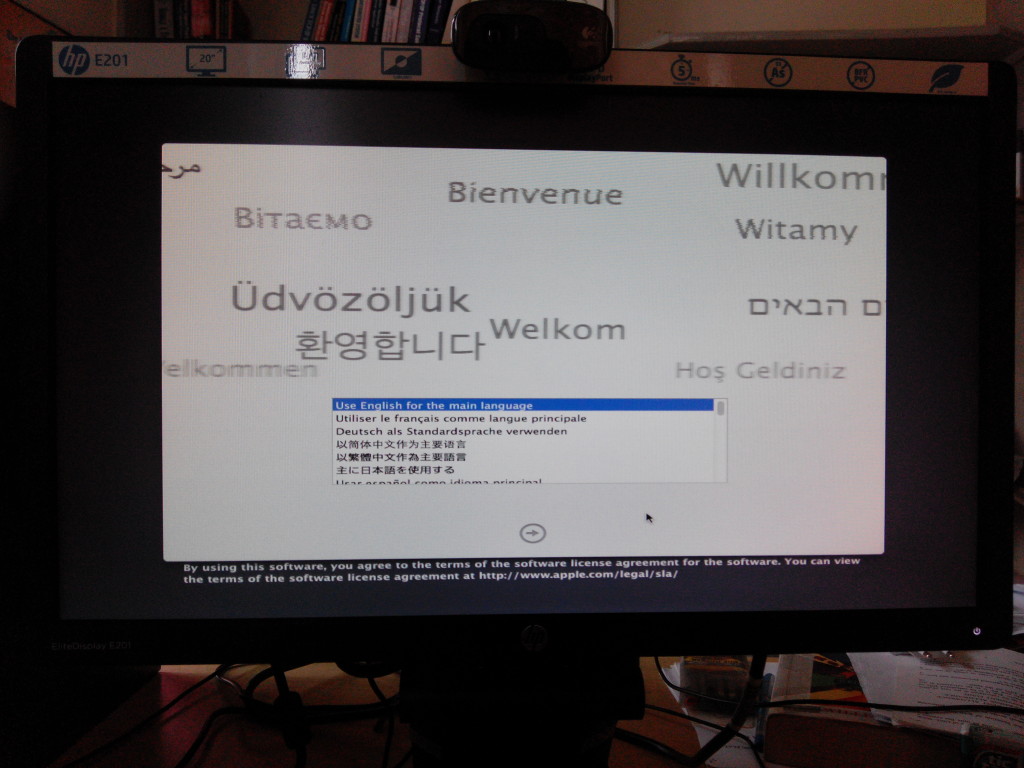
You will get a screen like the one below.

Type -v in the boot prompt and hit enter. If everything is okay, the OSX installation wizard will appear. Click the next button to continue.
After that, we need to create a partition on the new hard drive to install OSX to. For that, we click Utilities on the top bar and then click Disk Utility. The Disk Utility window comes to the forefront.
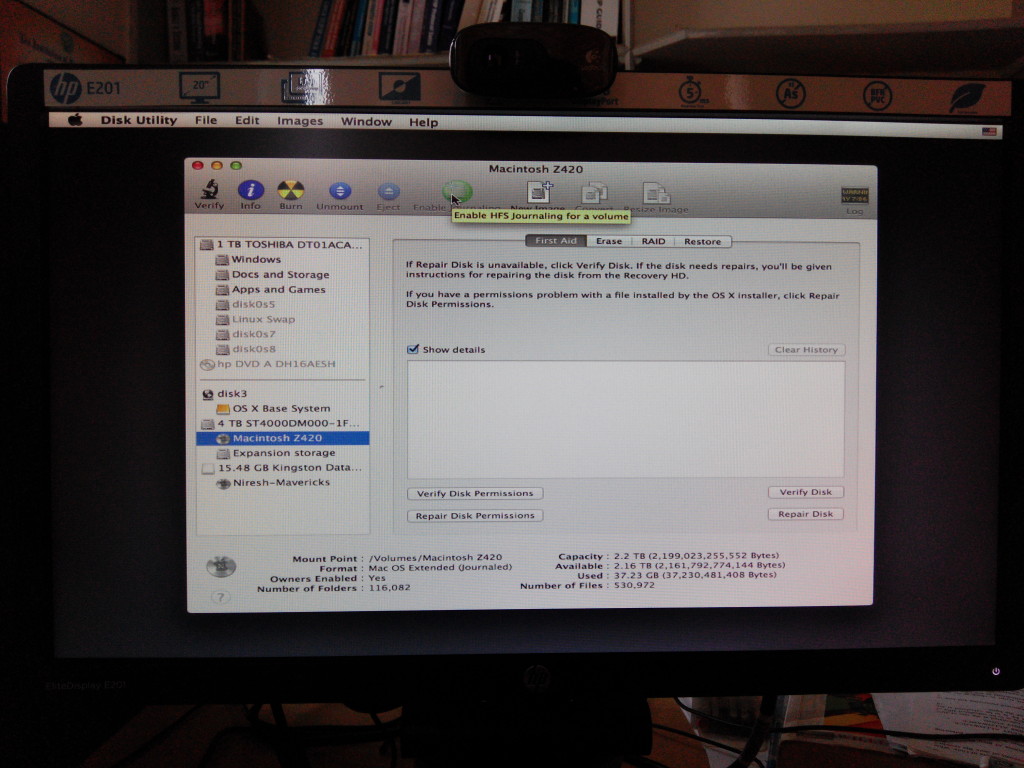
A guide to using Apple’s Disk Utility is here.
As you can see, using the Disk Utility, I’ve split my new 4TB HDD into two partitions, the first 2TB is a HFS+ partition for installing OSX and the last 2TB is an NTFS partition to store files and documents so that they can be read by other OSes.
For the Mac OSX partition, you need to choose Mac OSX (Journaled) as the partition type while creating a new partition. After that close the window to get back to the installer.
If you don’t like Disk Utility, you can use Parted Magic or GParted Live to partition your disks prior to launching the OSX installer. Make sure to use GUID Partition Table (GPT) if you have a drive of size greater than 2TB. Also remember that OSX needs a HFS+ volume to install to.
Accept the terms and conditions and any other instructions that show up. At the point where you get to choose the disk to install OSX to, click the Customize button.
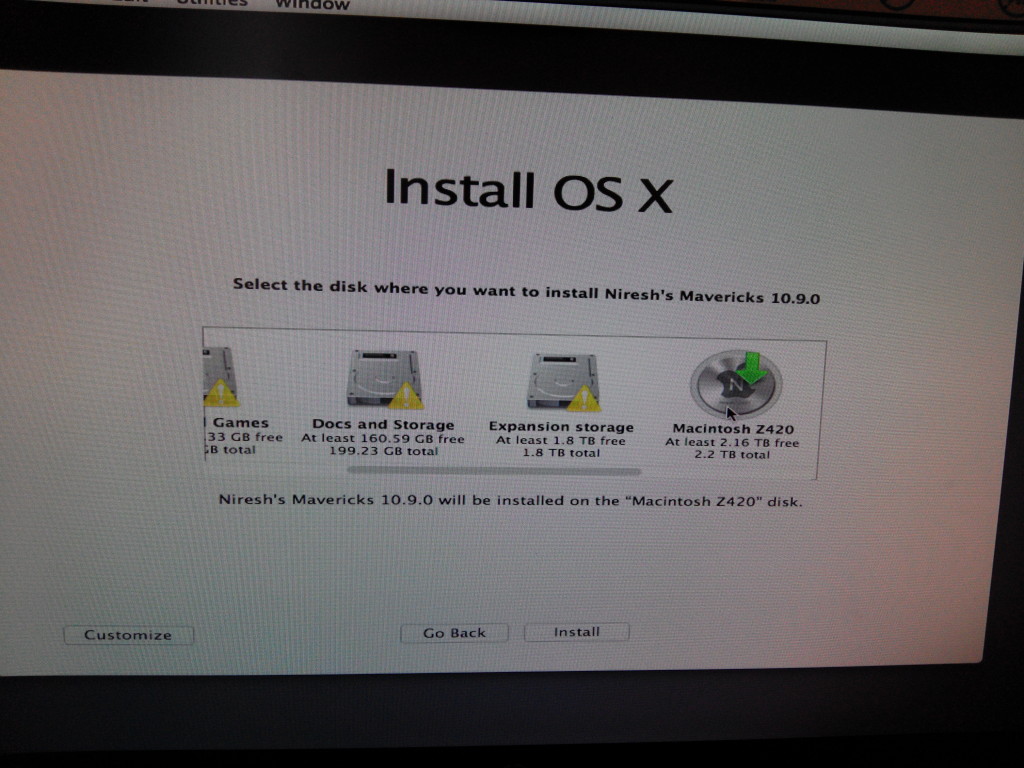
A customization window will open up.
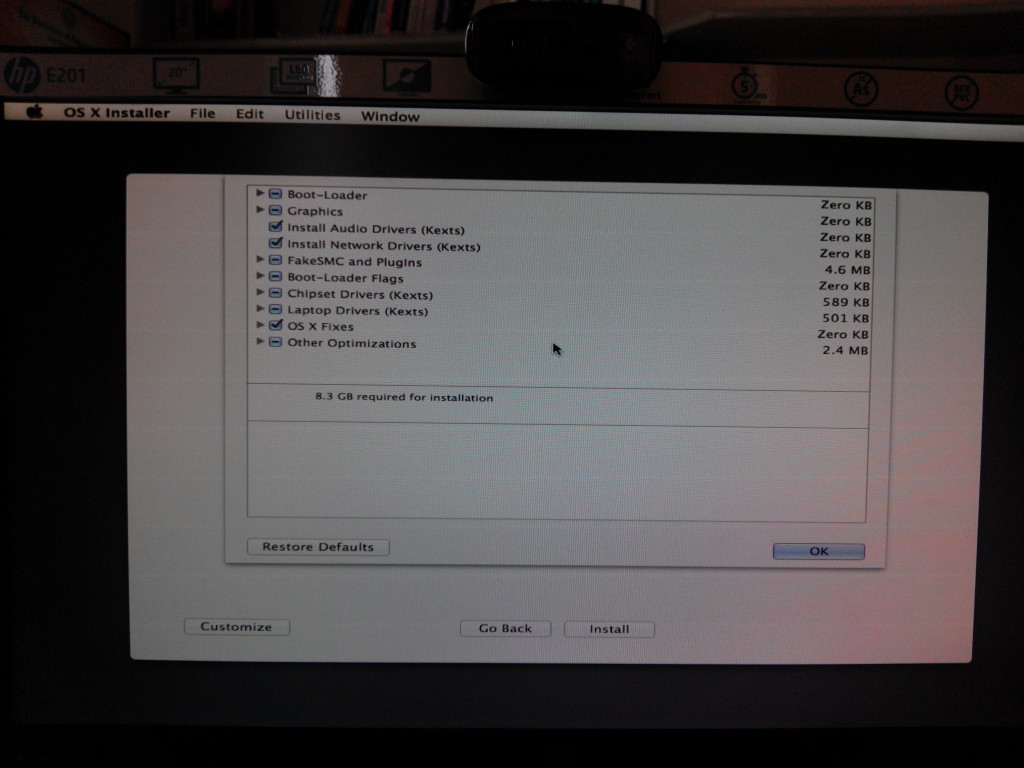
Under FakeSMC and plugins, checkmark FakeSMC and FakeSMC plugins.
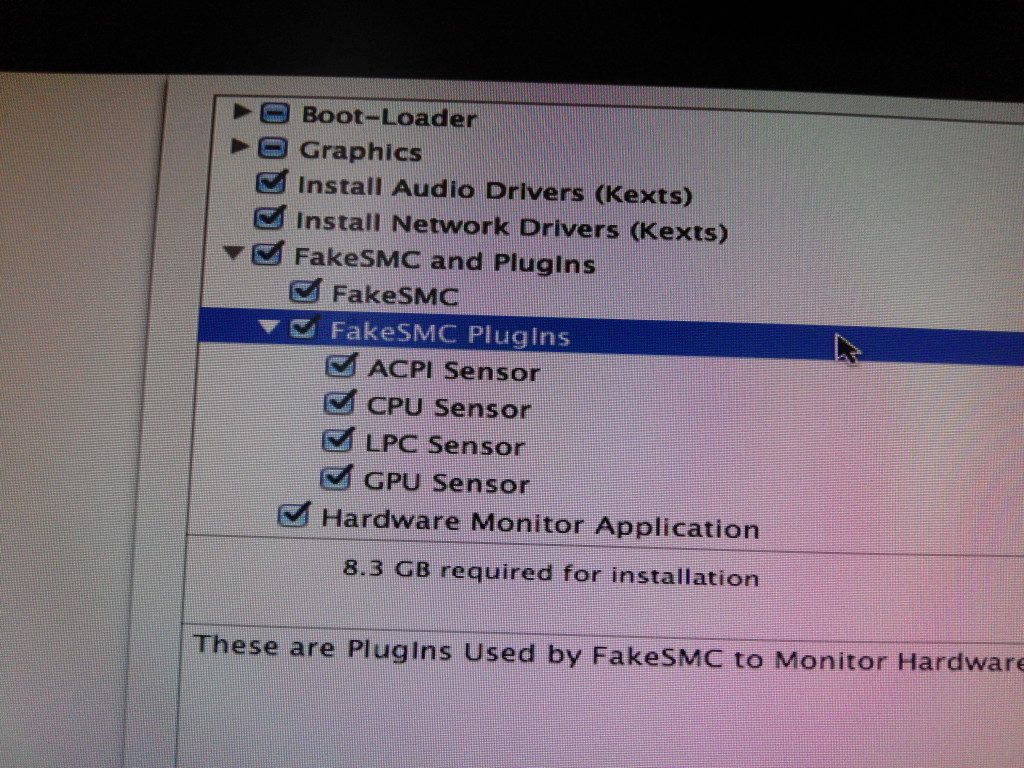
Under Chipset drivers, checkmark EvoReboot and NullCPUPowerManagement.
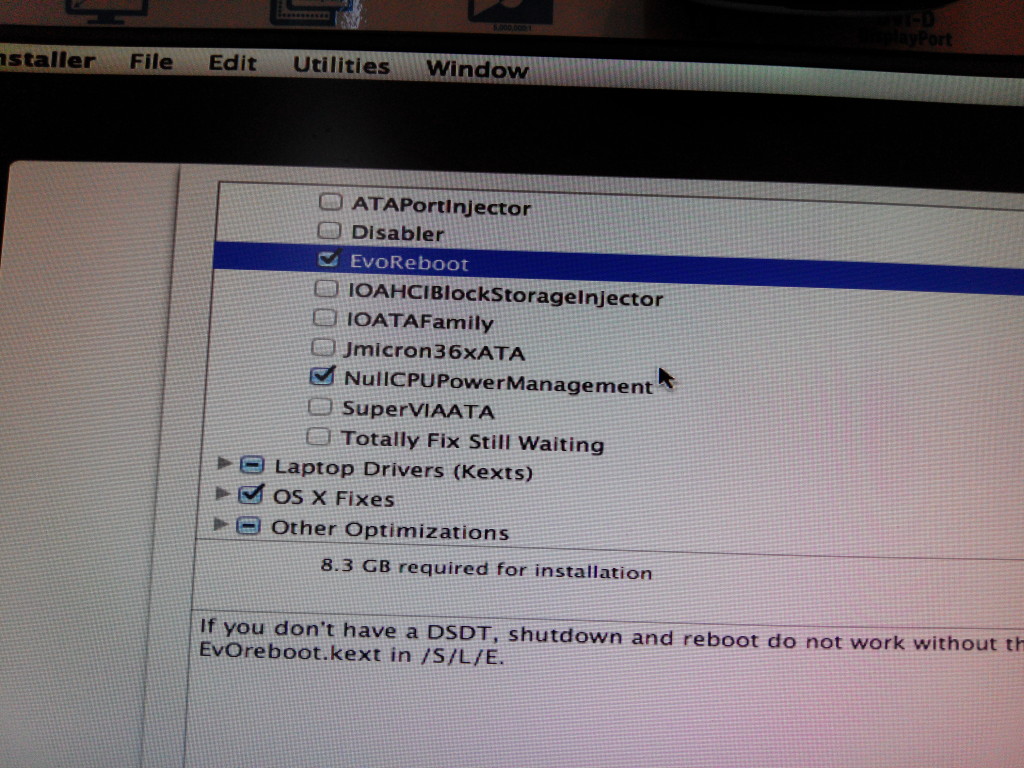
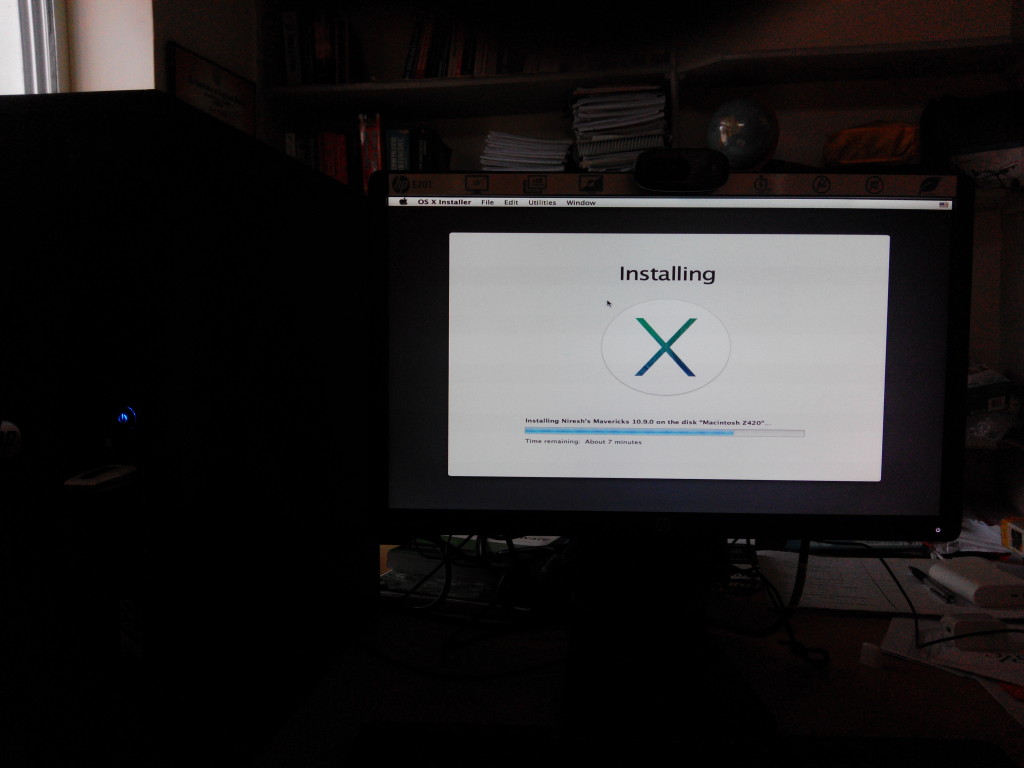
Keep other settings unchanged and click OK to exit the customization menu and then choose your disk and click Install to begin installing. The installation will take as long as 40 minutes so in the meanwhile its better to go out for a walk or get occupied with some other activity.
The first boot
Once the installer has finished installing, reboot the workstation. If the workstation is set to boot from the first HDD by default, press F9 and choose to boot from the drive that the OSX has been installed to. You’ll need to do this every time you boot OSX unless you set the computer to boot from the OSX drive. Soon enough, we’ll get to the Hackintosh bootloader screen where you’ll see an icon for the drive you’ve installed. Use the down arrow key to scroll down the boot options and choose to boot in verbose mode.
If everything goes fine, head to the next step. If your computer does not boot due to a kernel panic, force shutdown using the power button, boot up to the bootloader and choose to boot in single user mode. You will be dropped into a recovery command line prompt. After that type the following in order in the prompt:
fsck -fy
mount -uw /
mv /System/Library/Extensions/AppleIntelCPU* /
reboot
The workstation will reboot. This time let it boot OSX in verbose mode again. If everything goes fine, you will be greeted through a series of welcome screens to set up the time/date, user account and the like.
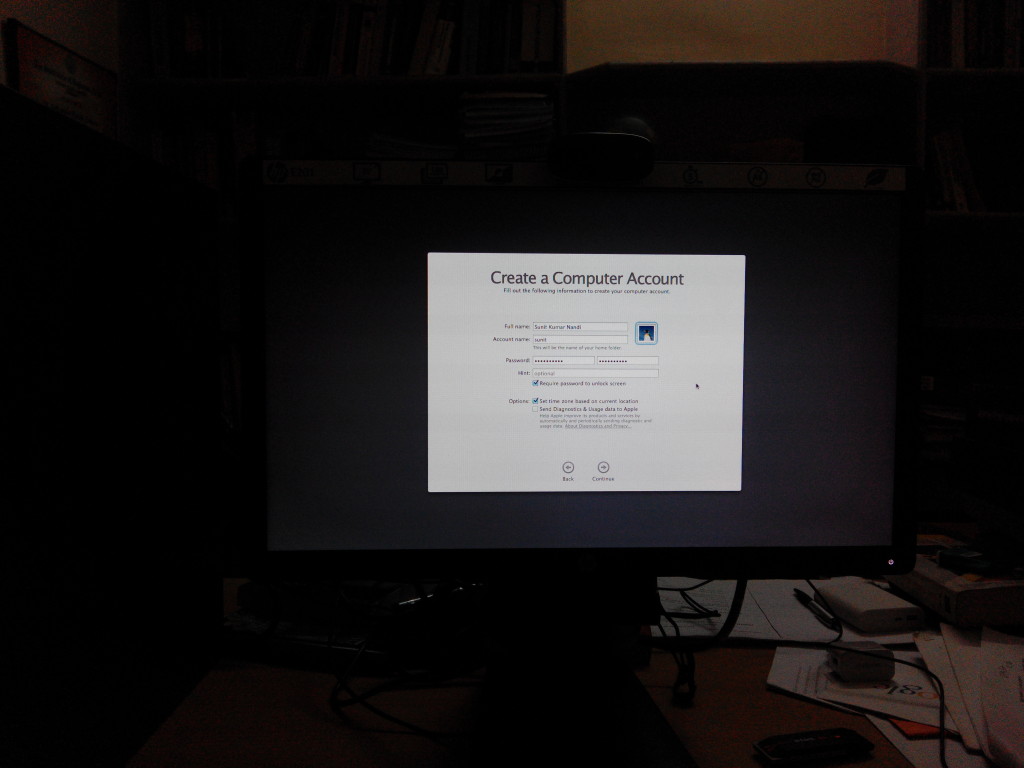
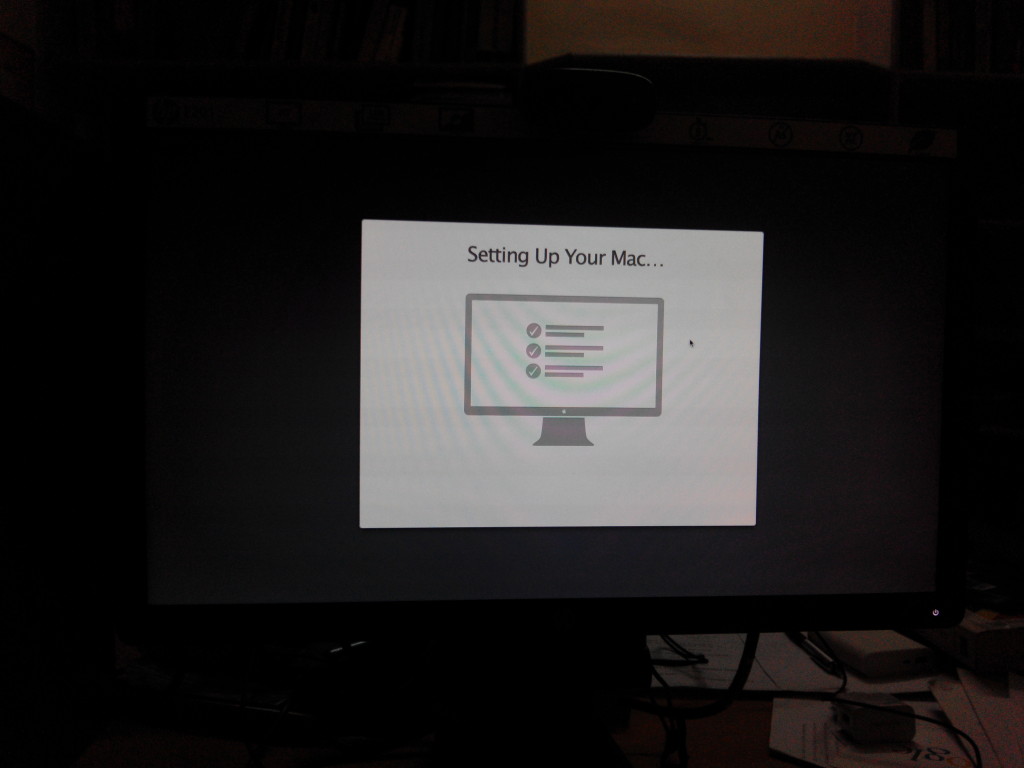
Complete them one by one and you’ll reach the desktop. From here, the Niresh installer will automatically install the required kexts/drivers required by your Hackintosh setup automatically.
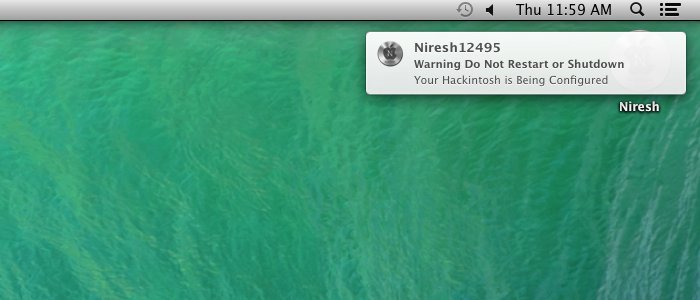
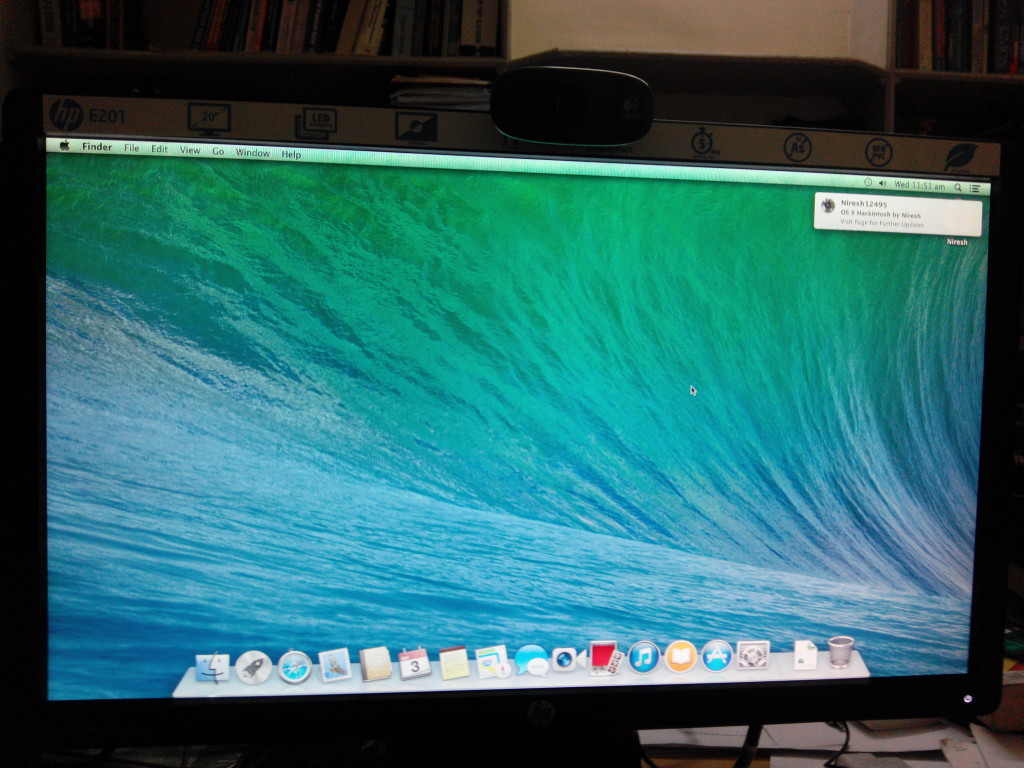
Do not do anything and let the process continue in the background. Once you receive a notification saying that the installation has been completed, restart your computer and boot back into OSX. Your computer will be running with all hardware working, including sound and graphics. After that we move on to the next step.
Upgrading to 10.9.5
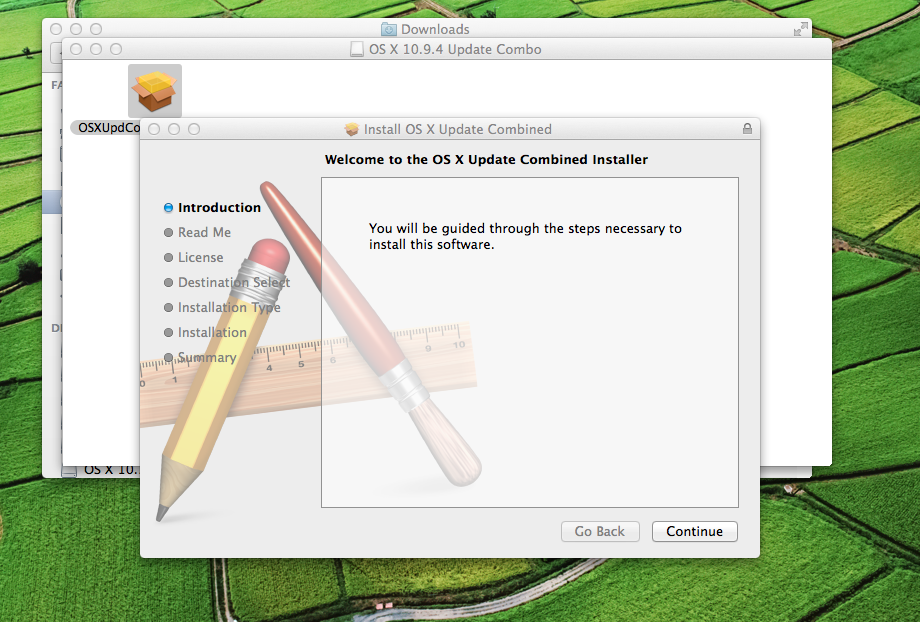
Niresh’s installer installs a proper working copy of OSX 10.9, but what if you want to use the latest and greatest version of Mavericks available (currently 10.9.5)? In order to do that you’ll need to download the OSX 10.9.5 combo update package from here. Put the file on your Mac. Double click the downloaded .dmg file to mount it and then double-click the package inside the window that appears to start the update.
Here’s an old screenshot of updating to 10.9.4 using the old combo package.
After the update completes, the workstation will be rebooted. Once back in the desktop, you might notice that computer shutdowns/restarts or the sound may not be working. To solve this problem, move on to the next section.
Installing missing kexts (drivers) and upgrade existing ones
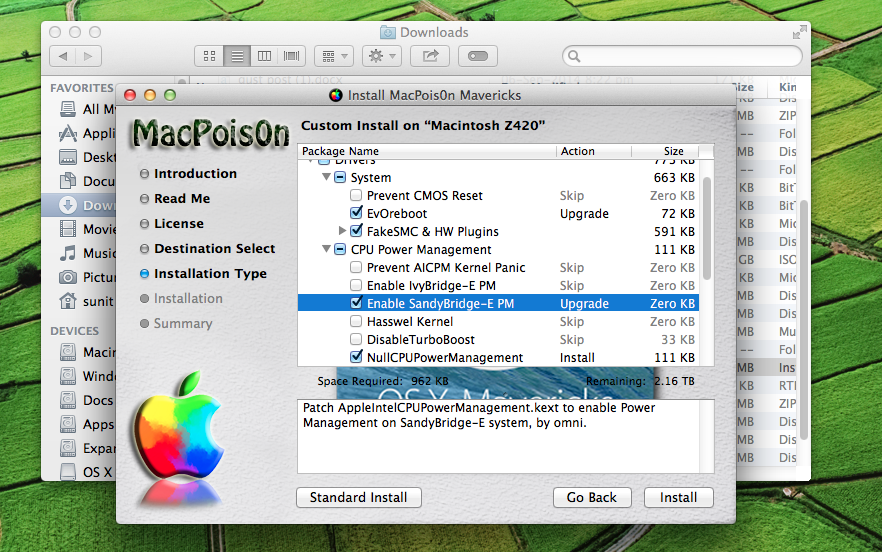
The OSX combo update package overwrites many modified kexts that enable OSX to run properly on a non-Apple machine. This causes many problems including losing control of vital hardware like power management, audio, network, etc. However, there is a solution to this. You’ll need to download MacPois0n Mavericks from here to install the missing drivers and to upgrade existing ones to newer versions. After downloading, unzip the file and double-click the .pkg file that gets extracted. Accept the terms. When you reach the place where you can choose your install path, click the Customize button and choose the kexts/drivers that you want to install/upgrade.
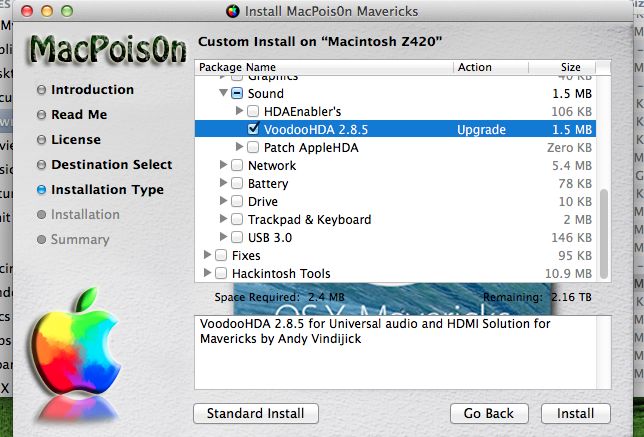
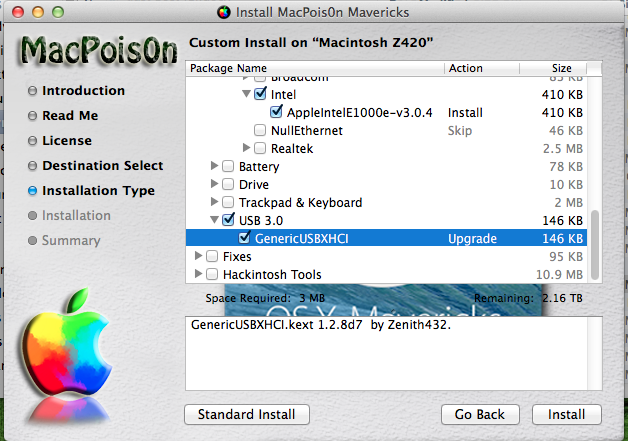
In my case I chose to install Sandybridge power management (since my Xeon is a Sandybridge), NullCPUPowerManagement and EvoReboot (which got overwritten by the update). I also chose to upgrade my sound drivers (VoodooHDA), Intel Ethernet driver, FakeSMC (for HWMonitor) and USB 3.0 driver to the latest version.
After this, reboot the computer and everything will be working again.
Its also recommended to apply all the minor updates in the software update section.
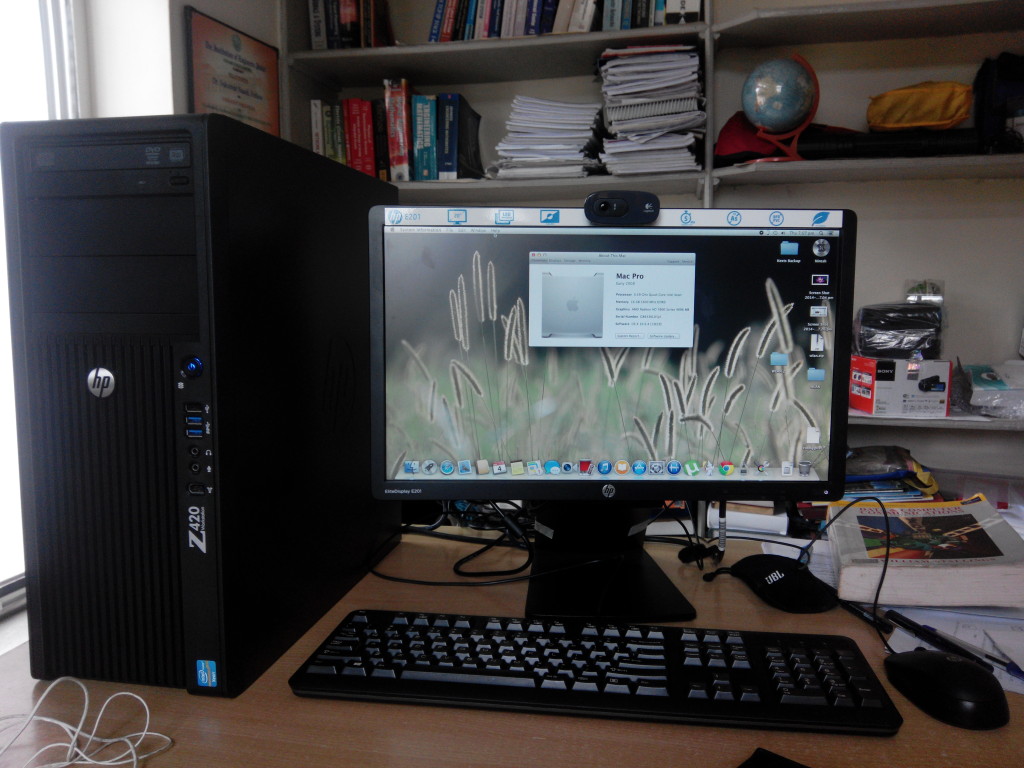
Sit back and enjoy your Mac Pro, sorry, Hack Pro
With all the steps complete, you have a full fledged Mac Pro that does everything you can expect out of a Mac, except the fact that it isn’t actually one.
You can enjoy music on iTunes, movies on QuickTime, messaging with iMessage or Facetime and install apps off the App Store. I have also installed cross-platform apps like Chrome browser, Firefox browser, uTorrent, Skype, VLC media player and Quassel IRC client and some Mac exclusives like Cyberduck file-transfer client and Adium messenger.
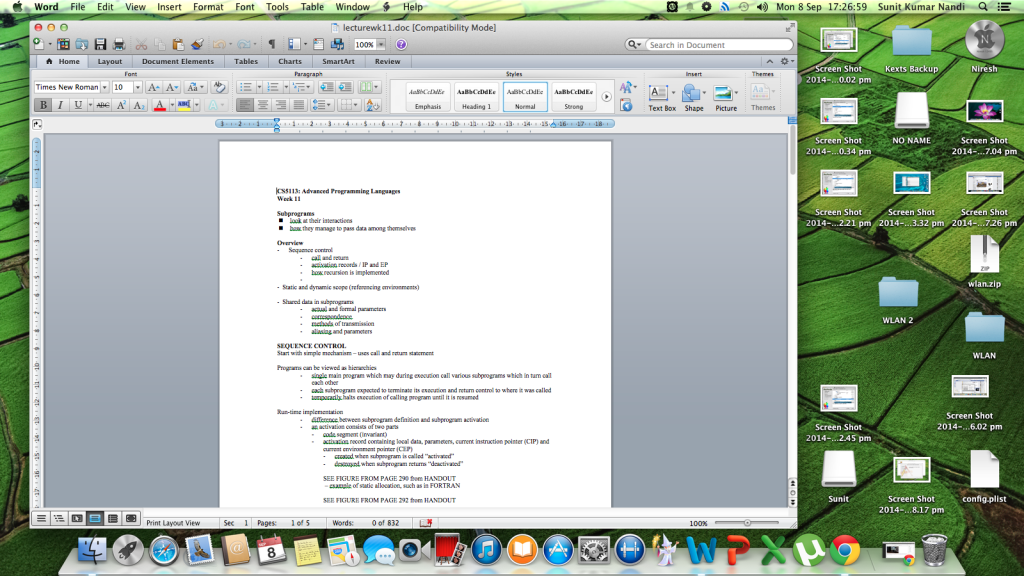
Even Microsoft Office on Mac looks really nice.
Feel free to explore more. For the geeky guys I suggest installing Xcode, the Atom text editor and trying out MacPorts.
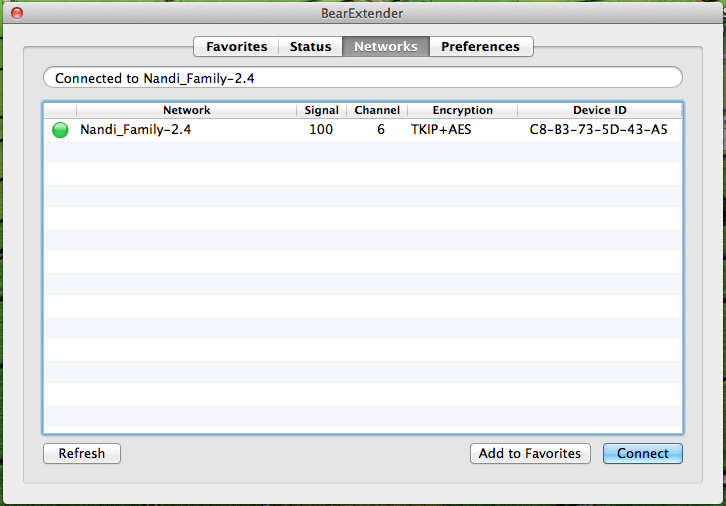
Bonus section: installing DLink DWA-125 802.11n USB wifi adapter in Mavericks
While setting up my new Hackintosh, I ran into problems with getting myself a working internet connection. My workstation resides in my study room while the wireless router (Linksys X3500) is present in the drawing room. In Windows or Linux, I just plug in my DLink DWA-125 wireless adapter and it works out of the box, connecting pretty easily to router but on OSX, it just wouldn’t work due to lack to drivers. A simple search on the web showed that the Mac drivers for DWA-125 were last updated on 2012 and supports Mac OSX 10.4 to 10.6 only. I installed the drivers anyway but faced kernel panic every hour or so. I decided to uninstall the drivers.
After researching a while, I came to know that the DWA-125 runs on a Ralink RT2870 chipset and also that many other wifi adapters use this chipset. This forum post on tonymacx86.com clearly stated a properly working driver for that chipset on OSX 10.9.4. The BearExtender 1200 wifi adapter also uses the same chipset as the DWA-125 and hence, the driver and connectivity software works for the DWA-125 too. You can get the drivers from here. Mount the dmg, install the package and reboot. Plug the adapter in and voila! The adapter works flawlessly and doesn’t worry me with kernel panic anymore.
Conclusion
So this is how I got my HP Z420 workstation Hackintoshed to OSX 10.9.4. For the final time I’d like to state that this guide is specific to the HP Z series workstations only. If you have a different workstation or computer, please choose your power management, chipset, audio and graphics kexts accordingly.
The usual disclaimer follows. I’m not responsible for what you do to your workstation. This guide has been provided “as is” and is without warranty of any kind.
Hope you liked reading my guide. In case you have any problem building your Hackintosh, feel free to open a discussion in our forum or Facebook group and I’ll be more than happy to assist you. If you have any feedback related to this guide, do leave a comment below. If this guide has helped you, then do share this post with your friends and on your social network circles.
I’ll be writing again soon. Thanks for surfing Techno FAQ! Happy hacking!


26 Comments
Bernard
8 September, 2014Great guide, i have a hp notebook 4740s laptop which is running osx 10.9.5 , (niresh) but the only thing i can’t get to work is my ralink wireless adapter. Who knows if/when there are drivers for this?
Sunit Nandi
8 September, 2014Great to know that my guide was of help to you.
So, have you tried the BearExtender Original drivers that I had mentioned in the post? They work with all Ralink cards as far as I know.
marcelvn
8 September, 2014I have a z420 as well. I can get to the installer screen, but disk utility does not show my internal HD. Any ideas how to overcome this? My BIOS offers different options. SATA mode i only got RAID+AHCI or IDE as options.
Sunit Nandi
8 September, 2014The SATA mode should be AHCI. I’m not sure about the RAID part because I never used it.
Why don’t you try upgrading your BIOS firmware? Maybe the newer BIOS might have the AHCI option.
marcelvn
8 September, 2014Updated the bios, AHCI alone is now available and the HD shows up in installer! My config is a little bit different then yours, I have a nvidia quadro 310. Does macpoison has the drivers for quadros?
Sunit Nandi
8 September, 2014The drivers for those will the in the Niresh’s OSX installer itself. Once you finish installing the drivers will be autodetected and installed.
DHEERAJ M VARIER
8 September, 2014I have a Ralink 3290 wireless adapter. So if i install bear extender software,will it give a kernal panic???
and if it is sucessful.. can i use my wifi connection in Mac OSX 10.9.4?
And also i have a IDT high definition audio driver. so wat to do to make my audio work???? In audio section it says “No output devices” ???? Please Help.
Laptop config:
AMD A8 4500M
8gb ddr3 ram
ati readon dual draphics
idt audio driver
realtek ethernet driver
ralink wifi adapter
(any other suggestion for me??)
Sunit Nandi
8 September, 2014Bearextender driver will work with any Ralink chipset.
Regarding the sound problem, install VoodooHDA audio driver.
Denis Sultu
8 September, 2014When i do -v it runs a bunch of commands and then reboots the PC and i am back at the same spot. I also have a Z420 with the latest firmware. What am i doing wrong?
Sunit Nandi
8 September, 2014Well, it seems like the fast-restart problem. Try this instead:
1. Disable Hyper-Threading
2. Disable Virtualization Technology (VT-x/VT-d)
3. Boot with the flags: npci=0x2000 -v
4. Re-enable Hyper-Threading and VT after installation is complete
Hope this helps
jdryyz
8 September, 2014Would love to see an updated version of this for Yosemite. I managed to use the Tonymac Unibeast install for Yosemite but have some questions remaining. It took a while to get the right boot flags but I have an installed system. I have not dug deep into your guide yet, however. I’m confused by one main difference. My Z420 appears to be Ivy Bridge where you say you have a Sandy Bridge. I would not think the CPU architecture would be different. What “real” Macintosh is the closest match for the smbios selection? My CPU is an eight core but only 4 are shown in the System Report.
Sunit Nandi
8 September, 2014You can get Niresh’s Yosemite build (called Yosemite Zone). The installer works great with the boot flags npci=0x3000 -v
jdryyz
8 September, 2014Yes, npci=0x3000 was what I needed to get the Yosemite installer working. I also discovered I needed to use a USB 2.0 port instead of USB 3 for the installer. The problem I am facing now is kernel panics. Again, I did not step through post-install customizing yet in your guide. I am taking a simpler approach and only doing one change at a time. I just installed a bootloader only and I this will result in a kernel panic. The tonymac USB boot works fine so I believe I need to focus on adding the CPU related kexts. I suspect I need NullCPUPowerManagement. I used v2.9 of MacPoisOn (for Yosemite) and looked for the Ivy Bridge E-PM but only Sandy Bridge was available. Hmmm. Maybe I should try an older version??
jdryyz
8 September, 2014Well, I’m getting closer. I was able to solve the kernel panic problem by installing the NullCPUManagement.kext. I Installed the latest Chimera bootloader from MultiBeast for Yosemite and nothing else.
Unfortunately, when booting from the hard drive using the bootloader, the system hangs on that BluetoothHCIController part. All searches indicate a graphics problem but I had no trouble booting from any of my USB installers with the Quadro K2000. Whatever the default setting is seems to work. Just in case, I did try GraphicsEnabler=Yes/No and it did not help. Then, I went as far as unhiding the Extra folder on the USB installer and loading the chameleon settings file. There was nothing in there pertaining to graphics! I went ahead and copied it over to my system drive’s Extra folder and rebooted. It still gets stuck at the same place! So there must be something else on the USB boot (more kernel extentions) that is making it work. I just do not know yet. Sorry, I am a little leery about trying a new installer method (Niresh) as I am much more comfortable about using Tonymac. I would try MyHack if it were available for Yosemite.
jdryyz
8 September, 2014I do not need another Mavericks system but just wanted to provide a comparison. Mavericks on the Z420 does not have the problem mentioned above. I only needed a couple of kexts and all is well for the most part. With the exception of a few things: 1) Audio. I could not get a hold of the MacPoisOn installer noted in your guide so I just found the packages/kexts I needed. The VoodooHDA 2.8.5 seems to provide all of the digital and analog options that are available. I do not currently have the means to use HDMI audio so I have speakers connected to the rear line out. Only problem is I am not hearing anything. I tried switching to the front headphone input and attached some headphones. I am hearing something but it is really low even with the volume on the highest setting. I see that there is a VoodooHDA preferences pane but not sure what benefit this is as nothing affected the volume output. Maybe better to go digital? 2) The second problem I am having is with CPU temps. When doing some simple encoding with HandBrake, my temps (as reported by HWMonitor) shot up to 85c! I started to get warnings from the monitor (seems right since the T Case max is 70c as reported on the Intel site) but I did not hear any increased fan activity or heat output from the tower so I’m not sure what HWMonitor is reporting is accurate. I did update to the latest FakeSMC plugins, but for some weird reason the latest version of the HWMonitor itself does not launch. I had to revert back to v6.17.1386. Maybe this is what I need the Ivy Bridge E PM for?? Is this an option I can enable using the Chameleon Wizard? 3) USB 3.0 seems to have something wrong but I am not sure what. I used the same GenericUSBXHCI.kext (1.2.8d7) as you but I am getting read errors and weird behavior when icons load from the USB volumes. I would need to post a pic to describe in properly.
jdryyz
8 September, 2014Okay, I was able to grab MacPoisOn 1.5 from InsanelyDeepak’s website. Here’s the weird thing, I *only* show an option to Enable SandyBridge-E PM, whereas you show both SandyBridge and IvyBridge in your screenshots above. Are you using a different version of MacPoisOn than I am? I also noticed my copy says “Xtreme AIO Tool” on the title bar and yours does not. But, here’s the other thing, your systems specs show the same CPU as my own, so why is yours a SandyBridge? I confirmed I have an IvyBridge CPU by running Intel’s MacCPUID program. Of course, none of this matters if it has nothing to do with my high CPU temps. I can always get a Windows system configured and test HandBrake again.
Sunit Nandi
8 September, 2014I am using the MacPoison that is on Niresh’s website: http://hackintosh.zone/
Mine’s a Sandy Bridge. The 1620v2 has both Sandy Bridge and Ivy Bridge versions. Mine’s an older one, or what that it claims to be. If yours is an Ivy Bridge, use the Ivy Bridge power management.
Regarding the fans, it is a known problem that a Hackintosh cannot access the fans because there is no driver for it. So it cannot turn up or down the fans on need. All it can do is measure the temperature and tell you. You can change the fan idle speed to a higher value using the BIOS/firmware. Keeping it at a higher value helps keeping the system cool during high load.
jdryyz
8 September, 2014Interesting on the fans. I have not read anything about that being a problem with Hackintosh systems. On my Mac Pro 2008-ish Hackintosh (HP xw8600) with dual E5450 CPUS, the temps do not exceed their max value under load. I do not see how thermal max could be avoided under load unless there was fan control in place.
I would make the Ivy Bridge selection if I had it to choose. As I said, it is not listed for me. More importantly, though, what I am gaining by installing this? It would *seem* to be just the type of thing that applies to the CPU activity I am seeing (due to my current lack of power management) It is not always clear why additional components are needed and this is a good example of one. I do not see an equivalent for this with other post-installation utilities. Is it unique to MacPoiSon?
Delta
8 September, 2014How could you enabling SAS port on z420? I have z820 and got problem at SAS port. Thx
Sunit Nandi
8 September, 2014The SAS port is enabled by default, you don’t have to do anything. The only thing you need to change is SATA to AHCI.
Delta
8 September, 2014On bios or motherboard?
Delta
8 September, 2014My disk utility cannot detect SAS HDD?
What kext you use for enabling SAS HDD.
Thx
Delta
8 September, 2014Thx for your tutorial. I was installed my HP Z820 to Mavericks 10.9.0 with niresh. The problem is after updating to 10.9.5, my computer going slowly. It’s to heavy to run application. Can you help me what’s wrong with 10.9.5 update? Thx
Roy
8 September, 2014I am attempting this installation on the identical setup. My installation keeps failing and I am unable to correct it. could you take a look at the installation log below and see if you see anything I am missing. Any and all help would greatly be appreciated. her are the last lines of the error logs
Jul 18 03:25:39 localhost OSInstaller[376]: PackageKit: Using / as external payload root for package com.apple.pkg.BaseSystemResources
Jul 18 03:25:39 localhost OSInstaller[376]: PackageKit: Extracting file://localhost/Volumes/Image%20Volume/Packages/Root-Packages/BaseSystemResources.pkg (destination=/Volumes/Macintosh Z420 Workstation/.OSInstallSandbox-tmp/Root, uid=0)
Jul 18 03:26:17 localhost OSInstaller[376]: PackageKit: Install Failed: Error Domain=PKInstallErrorDomain Code=110 “An error occurred while extracting files from the package “Essentials.pkg”.” UserInfo=0x7fc94fd4beb0 {NSUnderlyingError=0x7fc94f165a80 “The operation couldn’t be completed. cpio read error: bad file format”, NSURL=/Volumes/Image%20Volume/Packages/Root-Packages/Essentials.pkg — file://localhost/System/Installation/Packages/OSInstall.mpkg, PKInstallPackageIdentifier=com.apple.pkg.Essentials, NSLocalizedDescription=An error occurred while extracting files from the package “Essentials.pkg”.} {
NSLocalizedDescription = “An error occurred while extracting files from the package \U201cEssentials.pkg\U201d.”;
NSURL = “/Volumes/Image%20Volume/Packages/Root-Packages/Essentials.pkg — file://localhost/System/Installation/Packages/OSInstall.mpkg”;
NSUnderlyingError = “Error Domain=BOMCopierFatalError Code=1 \”The operation couldn\U2019t be completed. cpio read error: bad file format\” UserInfo=0x7fc94fd3c020 {destinationPath=/Volumes/Macintosh Z420 Workstation/.OSInstallSandbox-tmp/Scripts/com.apple.pkg.Essentials.hhRrBR, offset=3191636075, type=BOMCopierFatalError, sourcePath=/Volumes/Image Volume/Packages/Root-Packages/Essentials.pkg, NSLocalizedFailureReason=cpio read error: bad file format}”;
PKInstallPackageIdentifier = “com.apple.pkg.Essentials”;
}
Jul 18 03:26:17 localhost OSInstaller[376]: install:didFailWithError:Error Domain=PKInstallErrorDomain Code=110 “An error occurred while extracting files from the package “Essentials.pkg”.” UserInfo=0x7fc94fd4beb0 {NSUnderlyingError=0x7fc94f165a80 “The operation couldn’t be completed. cpio read error: bad file format”, NSURL=/Volumes/Image%20Volume/Packages/Root-Packages/Essentials.pkg — file://localhost/System/Installation/Packages/OSInstall.mpkg, PKInstallPackageIdentifier=com.apple.pkg.Essentials, NSLocalizedDescription=An error occurred while extracting files from the package “Essentials.pkg”.}
Jul 18 03:26:17 localhost OSInstaller[376]: Install failed: The Installer encountered an error that caused the installation to fail. Contact the software manufacturer for assistance.
Jul 18 03:26:18 localhost OSInstaller[376]: Reverted bless to disk Macintosh Z420 Workstation
Jul 18 03:26:18 localhost OSInstaller[376]: Allowing machine sleep.
Jul 18 03:26:18 loca
darren young
8 September, 2014Boots to a gray screen and freezes no matter what I do
Alex Scott
8 September, 2014Everything works great on my hand but I have issues trying to copy files from my ext hdd to the internal one. I have a WD Velociraptor 10k 160gb on my z420.. reinstalled niresh mavericks to times but all the times i get this error -36 message….on random files from the ext hdd to the WD (osx disk) .. I’m trying to install os x on a fresh new ssd from kingston..I hope it was a problem with the WD. I’ll let you know. And thanks for this guide….its great